
In this second article on recording for oral history, Tim Bowdendiscusses techniques useful both for those who want ‘broadcast quality’ material, and researchers who are recording mainly for transcripts. Many procedures, in fact, apply across the board.
Not scaring them to death…
By Tim Bowden
Recording oral history for radio is an added challenge for the practitioner. To achieve what we call ‘broadcast quality’ you need a reasonably good microphone positioned no more than 30 centimetres (12 inches) from the subject’s mouth, and if possible even closer.
This can be intimidating, particularly if the microphone is positioned too high near the eyeline of the interviewee’s face. However this can be minimised by sitting at a square or rectangular table, and ‘working’ across the corner from two high-backed dining room chairs. The microphone can be placed on a small stand, and angled up towards the interviewee’s mouth, but not in front of his or her eyes!
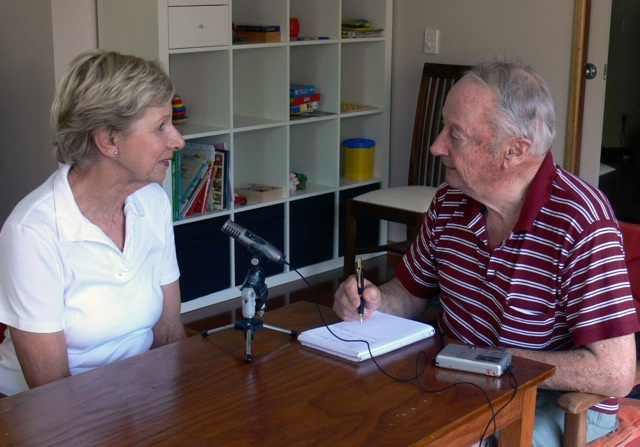
Recording with a microphone
(I was once interviewed by a young woman from ABC News about a current project, and she suddenly lunged at my nose with the microphone after asking her first question, which actually made me pull back in fright! I felt like counselling her after this ordeal was over, on how to conduct an interview without scaring the subject to death – but diplomacy held me back.)
Creating intimacy
There are simple ways to create intimacy in extended oral history interviews.
* The technique I prefer is to work across a corner of the table with the recorder away to one side, but easily seen by the interviewer who can check to see it is working, and not over-modulating.
* The high-backed chair means that the interviewee cannot lean back away from the correct recording position. Needless to say phones should be unplugged, mobiles switched off and windows closed to keep out traffic noise. It is helpful if someone else in the house can act as a guard to prevent interruptions.
* Choose your recording area carefully. Shiny floors, windows with no curtains, and appliances such as refrigerators that are likely to start up with an unwanted clatter or buzz,should be avoided.
* Kitchens are not a good site, as bright surfaces tend to bounce back an echo. Better to go to a dining room or even a living room if there is a suitable table. Even a card table brought in for the purpose is better than trying to interview from a deep couch, or armchairs.
* The table is useful for having notes to hand, or jotting down some future questions on the run. It is a good idea to have basic questions to hand, as long as they are not relentlessly adhered to. Following up on what has been said is essential. Sometimes it can be as simple as saying, ‘Could you tell me more about that’?
* The intrusion of the low placed microphone is minimised by making eye contact with the person talking, not looking out the window and declaiming to the world at large.
Oral history is a deeply personal exchange between two people. Getting eye contact and keeping it is, in my view, essential. The interviewer reacts with his face, not his voice. The subject is talking to YOU.
Transcripts
Many of these principles also apply to the oral historian who plans to use the recordings principally for transcripts.
The cleaner and sharper the recorded sound is, the better for the transcriber, and anyone in the future who may need to check the transcript against the audio. Irony can sometimes not show up in the transcript for instance. In the very early days of this craft, original recordings were often junked once the transcript had been completed! Quelle horreur!
A good quality recording from a digital recorder with an inbuilt microphone may well be useful later for sound grabs for publicity purposes, or on the internet.
In the digital age, getting a good recording has become much easier. In the analogue days, a cassette recorder with an inbuilt microphone was a disaster, because of the rumbling of the motor pulling the tape past the heads masking the incoming sound. But today, a small digital recorder can be discreetly placed in front of the interviewee.
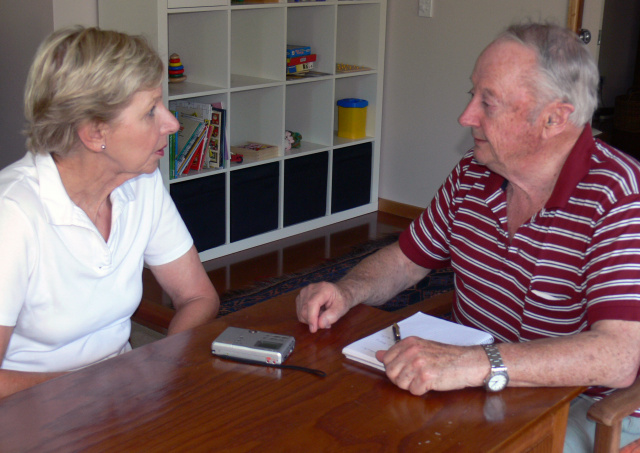
Interviewing with a digital recorder
Questions
It is important, though, to have the questions reasonably clearly recorded.
By working across the corner of a table, as I mentioned earlier, you and the subject can be quite close together. This also helps the intimacy of the connection between the two of you. Simply ask questions in a clear voice and do not mumble, and they should be adequately audible.
If all this sounds unduly complicated, fear not. Once you take the time to set up a good quiet location, a table and high-backed chairs if possible, and the recorder placed to favour the principal speaker, all this recedes into the background and you can concentrate on encouraging your subject to speak and listening to what they say.
It is often a good idea not to jump in on every pause. Often people collect their thoughts and go on with an essential addition to the narrative if not interrupted with the next question on the list.
Identification
You should always identify your recording at the beginning by saying something like: ‘Identification: this is an interview recorded with Shamus McNasty in Newcastle, on Thursday the Ninth of October 2013. The interviewer is Tim Bowden. End of identification’.
I cannot tell you how important this is, because the name, date and place of the interview can be recovered if original notes are lost.
And when Tim Bowden is dead, someone in the future will know who asked those stupid questions.
The identification is also reminding the subject that they are now on the record, and not enjoying a preliminary chat.
This is important, because although you must put people at their ease, you don’t want them to actually forget they are being recorded and later say, ‘Oh I didn’t know you were recording THAT!’
Then again, someone might say, ‘Oh switch that thing off for a moment will you while I tell you what really happened.’ This you don’t want. My answer to this is, ‘Well we can switch off and have a break if you like, but it is no good telling me anything that you can’t put on the record.’
Take a Break
Talking of a break, depending on how elderly or frail your subject is, I think that it is a good idea to break after about an hour – unless the interviewee is in full flight and giving you material you would kill for.
When you do break, avoid like the plague talking about the topic in hand, because as sure as God made little apples, you will want to record it, and when you start again, the person may not tell it as well as they did the first time when the recorder was switched off. Small talk, jokes, anything ... but not continuing on the topic you came to record until the recorder is on again.
* * *
In the next Oral History reflection Tim Bowden explores a family oral history with a difference that may be a way to go for some.
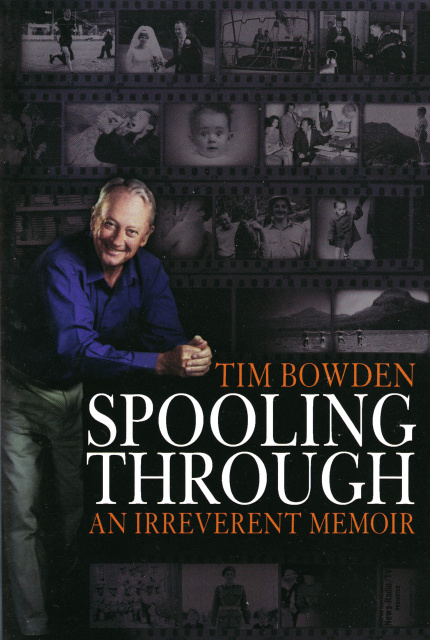
Tim Bowden’s website is www.timbowden.com.au, where copies of his available books can be ordered.
Photo Credits:
Recording with a microphone: courtesy Tim Bowden.
Digital recording: Tim Bowden.
Spooling Through: An Irreverent Memoir: book cover courtesy Tim Bowden.